Cold chain 0–4℃ all the way · Shipped from our Shenzhen HQ · Same-city delivery in 30 min–1 hr on average
Orders / WeChat +86 177 2268 8973中文
CYUTEA

New products, recipes and company news

More new products on the way

Add us on WeChat to hear about new products and samples first.

Follow on WeChat →
2026.11 · New Arrivals New arrivals · Menu ideas for milk tea shops

Milk tea shop owners, take note!
Wei-Chuan Raw-Milk Yogurt “Nong 2000” is here
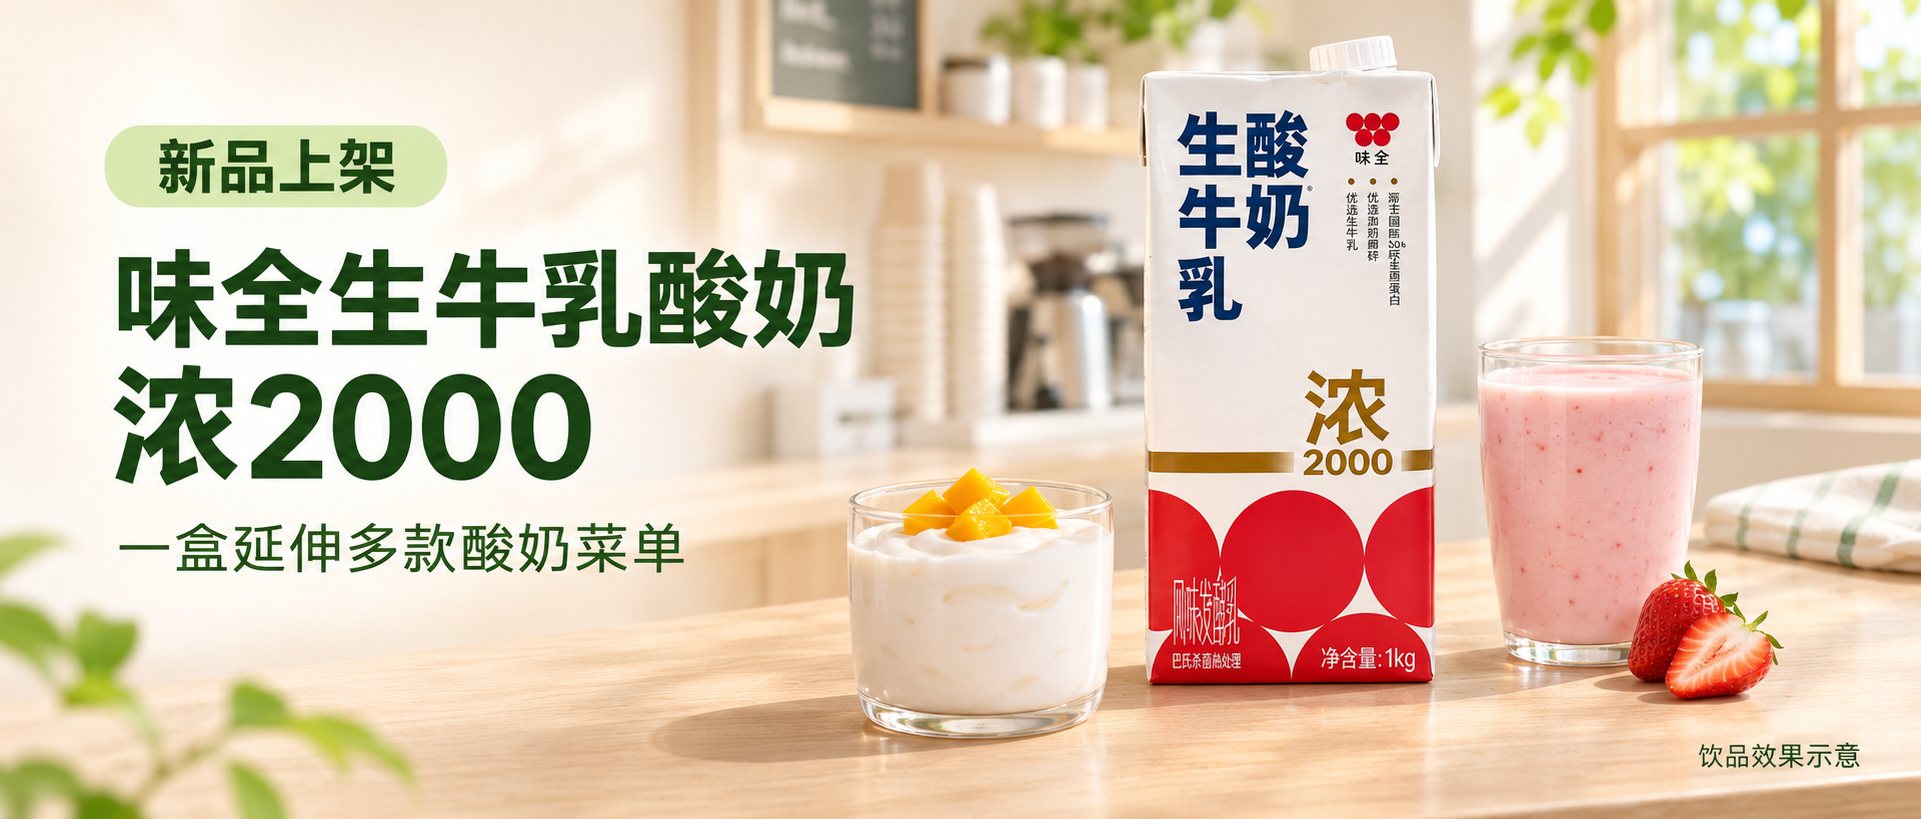
Wei-Chuan Raw-Milk Yogurt “Nong 2000” with a mango yogurt cup and strawberry yogurt smoothie (AI-generated illustration)
Wei-Chuan Raw-Milk Yogurt “Nong 2000” | AI-generated scene

Looking to freshen up your menu? Start with a cup of yogurt. Bright mango, sweet-tart strawberry, soft banana and crunchy granola can all build on the same yogurt base.

What's arriving is Wei-Chuan Raw-Milk Yogurt “Nong 2000”: a 1 kg pack for in-store preparation, and a starting point for menus like fruit yogurt cups and yogurt smoothies. If you want a yogurt line and an easier-to-manage set of ingredients and steps, add it to your test list.

01 / Meet the new product

One carton of Nong 2000, a whole yogurt menu

Product detailsWhat we're introducing
NameWei-Chuan Raw-Milk Yogurt “Nong 2000”
Net weight1kg
On the packFlavored fermented milk · Pasteurized
UsesFruit yogurt cups · Yogurt smoothies · Granola yogurt cups

This product is designed for thick-yogurt applications. Existing coverage of the brand describes it as a yogurt ingredient for the food-service channel, mentioning uses such as fruit bowls, smoothies and slushes.[1] For stores, the most worthwhile thing to test first is how it works with your own fruit, granola and cups.

The thick texture coats fruit and granola in a way tea can't, and for smoothies you can adjust thickness with milk, fruit and ice. Before launch, taste the base on its own, then decide on sweetness and topping ratios.

Read the pack before describing it The pack says it is pasteurized, so don't describe it as a live-culture or probiotic product; “raw milk” in the name doesn't mean it's unpasteurized either. Follow the delivered label for ingredients, nutrition, storage and shelf life.

02 / For your menu

One base, three ways to serve it

Fruit yogurt cups:Keep the white yogurt and colorful fruit in visible layers so customers can see the fruit. It's built in layers, and easiest to start with fruit you already stock.

Yogurt smoothies:Blend fruit and yogurt into a thick, smooth drink. Check that it comes up the straw easily and doesn't get thin as the ice melts before settling the recipe.

Granola yogurt cups:Smooth yogurt meets crunchy granola, easy to turn into a small cup eaten with a spoon. Add granola to order or pack it separately to keep the crunch.

Sharing one yogurt and pairing it with ingredients you already have keeps testing focused. Give each drink a clear flavor focus; there's no need to add lots of jam, syrup and toppings at once.

03 / Pairing idea

Mango yogurt cup: bright fruit you can see

White yogurt with golden mango looks fresh and bright. Put a little mango at the bottom, add the yogurt, then finish with mango cubes, so every cup has both smoothness and bite.

IngredientTest amount per cup
Wei-Chuan Raw-Milk Yogurt “Nong 2000”200g
Mango flesh80g
Ready-to-eat granola10g

Method:Split the mango into two portions; lightly press one and put it at the bottom of the cup. Add the yogurt, then arrange the rest of the mango on top. Sprinkle granola before serving, or pack it separately. Don't add sugar at first; taste, then decide whether to adjust.

04 / Pairing idea

Strawberry yogurt smoothie: fruit in every sip

Blended with yogurt, strawberry gives a soft color and a direct flavor. The difference from a layered yogurt cup is how it's eaten: fruit, creaminess and sweet-tartness all come together in one sip.

IngredientTest amount per cup
Wei-Chuan Raw-Milk Yogurt “Nong 2000”180g
Strawberry flesh60g
Milk40g
Ice40g
1:1 syrup (sugar to water by weight)0–10 g, added after tasting

Method:Prepare the strawberries according to your store's process, then blend with the yogurt, milk and ice in an ice-crushing blender until smooth, following the equipment instructions, and pour into the cup. Test without sugar first, then decide how much syrup to add based on the strawberries' ripeness and the base's sweetness.

Adjusting If you switch to sweetened strawberry purée or jam, recalculate amounts and sweetness. To change thickness, adjust only the milk or the ice at a time, and recheck the fill level.

05 / Pairing idea

Banana granola yogurt cup: smooth and crunchy together

Soft banana and crunchy granola add contrast to a yogurt cup. With natural colors and simple ingredients, it suits a small cup menu item eaten slowly with a spoon.

IngredientTest amount per cup
Wei-Chuan Raw-Milk Yogurt “Nong 2000”200g
Ripe banana flesh60g
Ready-to-eat granola15g

Method:Weigh the yogurt into the cup, slice the banana just before serving and lay it on top, then add the ready-to-eat granola. For delivery, pack the granola separately so it doesn't go soggy. Cut bananas fresh and check how they look at the expected eating time.

Test notes These are pairing suggestions, not official brand recipes, and have not been tested in a working store. Start with cups of about 300–350 mL for the mango and banana yogurt cups and about 350 mL for the strawberry smoothie. Grams are not the same as millilitres; calibrate fill lines through testing. Colors, thickness and fill heights in the images are illustrative.

06 / Getting ready to launch

Test a round first, then plan your stock

Pick the two that suit you first.Start with fruit you always stock, and record the base's sweetness and acidity, fruit aroma, thickness and how it looks in the cup. Settle on one yogurt cup and one smoothie before adding more flavors.

Stock by actual usage.At 200 g of yogurt per serving, 1 kg makes 5 servings in theory, less what clings to containers and is lost in handling. Add ingredient cost, fruit waste, cups and portioning supplies before setting the menu price.

Manage storage and opened packs separately.Follow the actual label for unopened storage, shelf life and requirements after opening. Don't infer a temperature or number of days from the words “pasteurized”. For cold drinks, pre-chill as your supplier recommends, and keep tools and handling hygienic when portioning.

Keep menu wording accurate.Don't claim “zero sugar”, “low fat” or health benefits without verification. All three contain dairy, and for the granola check gluten, nuts and cross-contact information. Before launch, check how texture holds for both dine-in and delivery.

To add a yogurt line to your milk tea shop, start with one carton of Nong 2000: mango for bright fruit, strawberry for a smoothie, and banana with granola for texture. Get the pairings right and record the amounts, and the new product has a clear path onto your menu.

Wei-Chuan Raw-Milk Yogurt “Nong 2000” is now in stock. Ask us about product selection, ordering and pairing testsContact us → Related products · Chilled DairyTake a look →

Product name, net weight and heat-treatment labelling are based on the packaging provided; follow the label on the delivered product. The recipes are test suggestions, not official brand recipes. Images are AI-generated scene and serving illustrations, not photos of tested recipes.

[1] Background on the product's applications: Xiaoshidai (food industry media), report of 24 April 2024. This article does not cite specific viscosity or nutrition figures; the three pairings are our own test suggestions.

2026.05 · New Arrivals Coffee shop specials · Boötes Craft kombucha

A real find: this sparkling coffee
is something special

Three flavors of Boötes Craft kombucha and a kombucha sparkling coffee (AI-generated illustration)
Coffee × Boötes Craft kombucha | AI-generated drink illustration

Espresso slowly sinks into the glass, deep brown swirling into amber, while tiny bubbles keep rising between the ice. Just looking at it makes you want to take a sip.

For a new take on familiar iced coffee, try coffee with Boötes Craft kombucha. The coffee brings roast notes, the kombucha brings tea and fermentation, and with cold bubbles on top, the special has somewhere new to go.

What goes into it? The base is simple: espresso, kombucha and ice. Get those three right first, then decide whether you need syrup or garnish.

01 / Breaking down the ingredients

What is the kombucha in this coffee?

Kombucha is a tea drink defined by fermentation. Boötes Craft's trade show materials describe fermenting tea and sugar with a SCOBY (symbiotic culture).[1] The three products provided add different fruit, floral or herbal flavors.

Going by the bottles provided, the three flavors are pineapple ginger, rose lychee and juniper mint. Each is labelled 290 mL and lists carbon dioxide in its ingredients. When mixing with coffee, we look at how the tea, fermented acidity, flavor and bubbles connect.

IngredientRole in the drink
EspressoBrings coffee aroma and the main flavor
Boötes Craft kombuchaBrings tea and fermentation notes; each flavor has its own emphasis
IceLowers the temperature and sets the chill and fill level

Before making it, taste the kombucha on its own, then the espresso, and note the acidity, sweetness and bitterness of each. Don't add sugar or milk at first, so each flavor is easier to pick out.

02 / Flavor ideas

Three kombuchas, three directions to pair

Pineapple Ginger Sparkling Coffee

Pairs tropical fruit with ginger. If you want something brighter on the menu, start here and check whether the fruit, ginger and roast notes work together once the coffee goes in.

Rose Lychee Sparkling Coffee

Built around floral and fruit notes. Start with a coffee bean your shop knows well and that has clear flavors, use a little less espresso to leave room for the rose and lychee, then work up to the right strength.

Juniper Mint Sparkling Coffee

Focused on herbal notes. Check the juniper and mint in the base first, then add coffee and compare the aroma and finish. Don't rush to add lemon juice or other syrups the first time; a simpler recipe is easier to adjust.

These are flavor pairing ideas; results vary with the coffee beans, extraction and ingredient batch. Start with one as your store's signature special, then expand the flavors.

03 / Base recipe

Make one cup, then find your own ratio

All three flavors can be compared using the base recipe below. Use a tall glass of about 400 mL and leave room at the top to watch the foam and the pour.

IngredientTest amount per cup
Chilled Boötes Craft kombucha (any flavor)180mL
Espresso (brewed)30g
Ice130g
1:1 syrup (sugar to water by weight)0–5 g, decide after tasting

About the amounts 30 g means brewed espresso, not ground coffee. This recipe is a suggested starting point for testing, not an official brand recipe, and has not been tested in a working store. Ice size, glass shape and foam vary, so calibrate fill lines on site.

Method

  1. Store the kombucha as directed on the bottle and chill before use. Prepare clean glasses and ice, and don't shake carbonated drinks.
  2. Pull espresso to your shop's standard recipe into a small pitcher or measuring cup and let it cool slightly before mixing, so scalding coffee doesn't hit the base.
  3. Fill the glass with ice and slowly pour in the kombucha, leaving room for the coffee and foam.
  4. Pour the espresso slowly over the back of a bar spoon or along the ice. Watch the foam and pause if needed rather than pouring all at once.
  5. Stir gently and taste. Judge the balance of the whole drink before deciding whether to add a little syrup. Make to order to keep the fizz.

Adding the coffee slowly and letting it cool slightly also follows the general method for sparkling coffee drinks.[2] The layered look is brief; a gentle stir before drinking makes it easier to taste the whole drink.

04 / Fine-tuning

Three places to adjust for a smoother cup

Too much coffee Keep the kombucha and ice the same and make a second cup with 25 g of espresso to compare with the 30 g version. Don't change the beans, sugar and base at the same time, or you won't know what made the difference.

Sweet and sour out of balance First check the coffee's extraction and the kombucha's own sweetness and acidity, then decide whether to change the amount of coffee, switch flavors or add a little sugar. Kombucha already contains sugar, so don't judge the drink's sweetness only by how much syrup you add.

Bubbles fade fast Keep the base cold and open bottles as needed; stir as little as possible once it's made. Pour the carbonated base straight into the glass; don't shake it in a sealed shaker or blend it at high speed.

05 / In your store

Be clear about ingredients and record every serve

Menu names can match the flavor used, for example “Pineapple Ginger Kombucha Sparkling Coffee”. When customers ask about ingredients, mention the coffee, the kombucha flavor and ice. The fruit and herbs in the images are props; if the recipe doesn't include them, don't list them as fresh fruit in the drink.

Cost by actual use: count the kombucha, ground coffee, ice, packaging and waste from opened bottles. Each bottle is 290 mL and this recipe uses 180 mL, so whether the rest gets used within its stated conditions also affects the cost per cup.

Follow each bottle's label for storage and use after opening. With regular espresso, the finished drink contains caffeine; sweetness, alcohol content and other details depend on the actual ingredients and drink, so don't simply call it “zero sugar” or “caffeine-free”.

The fun of this coffee is in how the aroma and texture change: coffee meets fermented tea, and tiny bubbles add layers to every sip. Next time you update the menu, pick a Boötes Craft kombucha and give it a proper test.

Want to know about Boötes Craft kombucha flavors, ordering and coffee pairings? Get in touchContact us → Related products · Tea & Coffee IngredientsTake a look →

Flavors and specifications are based on the bottles provided; follow the label on the delivered product. The recipe is our own test suggestion. Images are AI-generated scenes and drink illustrations, not photos; packaging text, actual color and layering depend on the real product and your own tests.

[1] Brand background: HOTELEX brand profile, 28 August 2026 (referenced only for the tea and culture fermentation background).

[2] Method reference: Tesco espresso tonic instructions (referenced only for letting the coffee cool slightly and pouring it slowly; the original uses tonic water, and the kombucha recipe here is our own).

2026.11 · New Arrivals CYUTEA · New Arrivals

A smile in every sip:
Gold Chocolate coffee beans are here

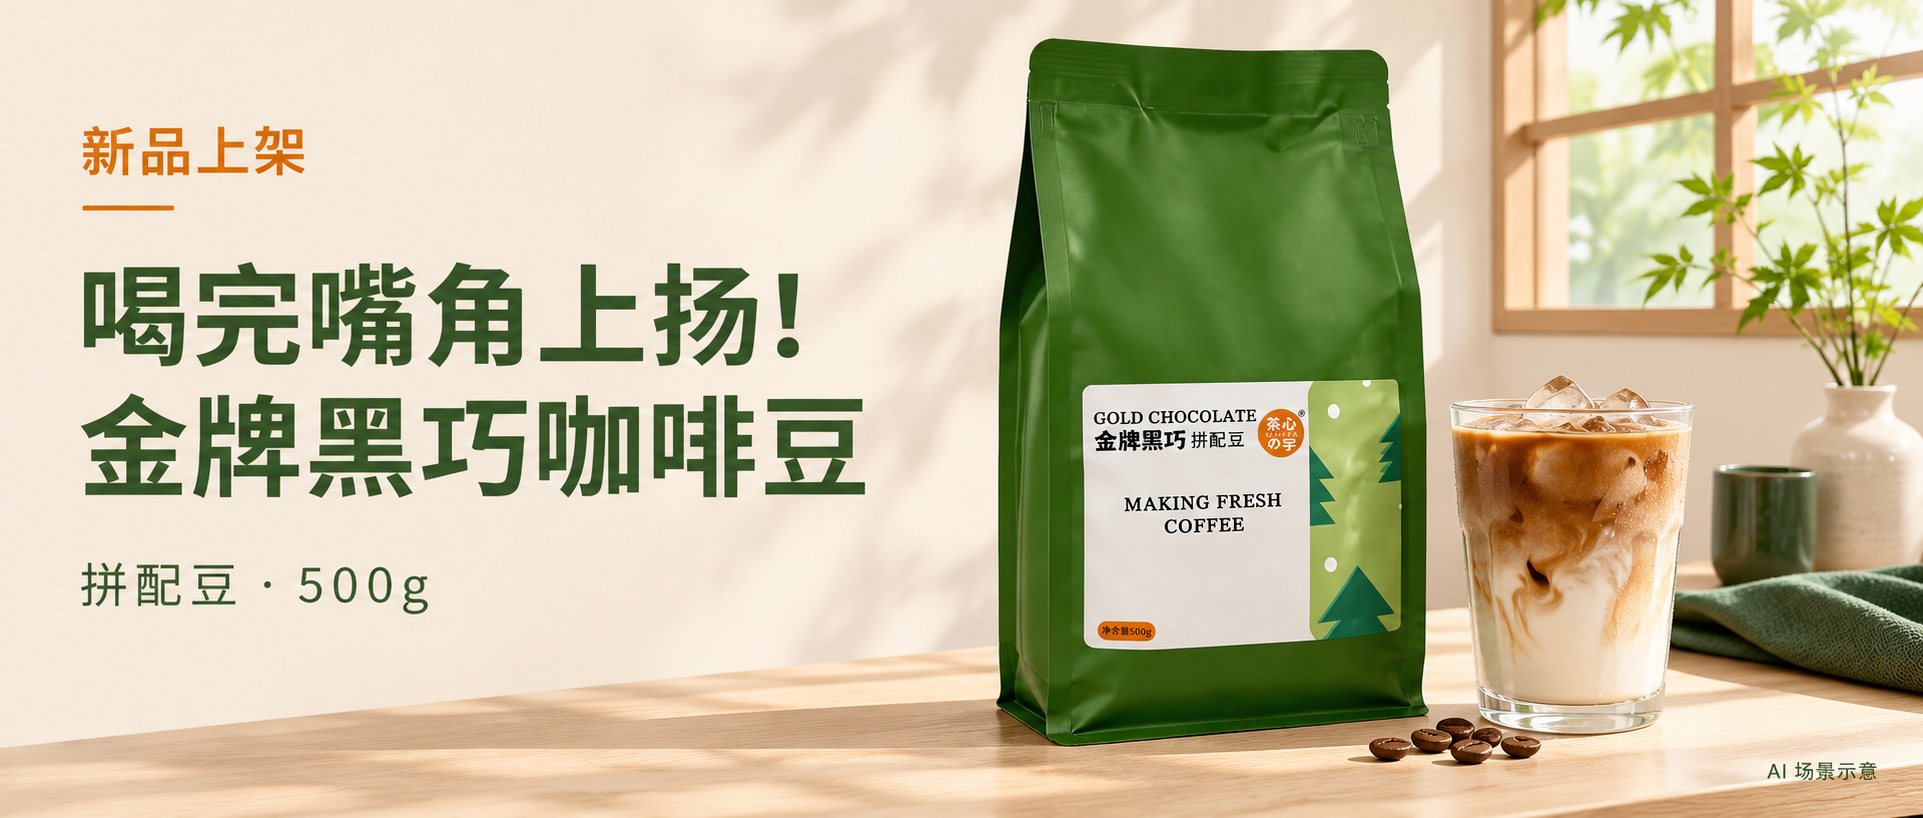
Gold Chocolate blend beans, 500 g green bag, with an iced latte (AI-generated scene)
Gold Chocolate blend · 500 g | AI-generated scene

Some happiness starts with a cup of coffee. Watching espresso swirl slowly into milk and leave pretty brown streaks on the glass gives a busy day something small to look forward to.

The star of this launch is Gold Chocolate coffee beans: a green bag with a simple label, marked as a blend, 500 g net. If you want to try a new bean on your bar, or rethink a familiar milk coffee, start with this bag.

Let's put the idea into cups: an iced latte, an iced americano and a dark chocolate mocha. Three directions from one bean, to find the coffee that suits your shop.

01 / Meet the new beans

Remember the green bag

Product detailsWhat the packaging shows
Product nameGold Chocolate blend
English on packGOLD CHOCOLATE
Net weight500g
Drink planEspresso-based: test a latte, an americano and a mocha

Gold Chocolate is the product's name. The most direct way to learn how it tastes in the cup is to taste the espresso first, then compare it with water and with milk: the first sip, the body, the finish. Which do you like most?

You can also present “dark chocolate” as a flavor to explore: does the cup bring cocoa or dark chocolate to mind? Let your own tests decide. The name doesn't mean chocolate is an ingredient, and the “gold medal” in its Chinese name is not proof of an award.

02 / Where to start extracting

Dial in the first espresso, then make drinks

When new beans go on the machine, start with settings that are easy to record. For a basket that takes about 18 g, try 18 g of ground coffee → 36 g of espresso, a ratio of about 1:2; watch for 25–35 seconds at first, then adjust by taste. This ratio and time range follow La Marzocco's basic extraction guide.[1]

18gGround coffee
36gEspresso
25—35seconds to watch first

These are general starting settings, not parameters verified for these beans. Match the dose to your basket size first; recording dose, yield, time and taste makes results easier to repeat than watching the seconds alone.

All three drinks below use 36 g of brewed espresso. The recipes are our own single-cup test suggestions and have not been verified in a working store; glass size, ice and milk foam affect the fill line, so calibrate before launch.

03 / First cup

Iced latte: a little creaminess for every day

For the first cup, start with a simple iced latte. Hold off on syrups and let coffee and milk lead, so you can see how these beans come through in milk coffee and leave customers room to adjust sweetness.

IngredientTest amount per cup
Gold Chocolate espresso36g
Chilled whole milk180mL
Ice130g

Method

  1. Fill a cup of about 400 mL with ice.
  2. Pour in the chilled milk, leaving room for the coffee and at the top.
  3. Pull the espresso and pour it in slowly. Stir gently, taste, and check the balance of coffee and milk.

Fine-tuning If the milk is too strong, make a second cup with 160 mL milk to compare; if the coffee is too strong, try 200 mL. Change one thing at a time for a clearer comparison.

04 / Second cup

Iced americano: let the coffee speak

To really get to know new beans, an iced americano is a direct comparison. Without milk or syrup, it's just coffee and water, so you can judge aroma, strength and finish, and see what kind of menu item it suits.

IngredientTest amount per cup
Gold Chocolate espresso36g
Cold drinking water160mL
Ice130g

Method

  1. Fill a cup of about 400 mL with ice, then cold water.
  2. Pull the espresso and pour it into the cup.
  3. Stir gently and taste; make another with 140 mL or 180 mL of water to compare and choose the strength that suits your shop.

Serving note If the coffee itself tastes unpleasantly burnt or sharply sour, check the extraction first. Adding water mostly changes strength; it doesn't fix extraction.

05 / Third cup

Dark chocolate mocha: dessert in a cup

For a more dessert-like drink, try a mocha. Here we add chocolate sauce and let the milk link the coffee and chocolate. Pair it with a small pastry for a proper afternoon treat.

IngredientTest amount per cup
Gold Chocolate espresso36g
Milk (measured before steaming)180mL
Dark chocolate sauceFrom 15 g, adjusted to the sauce's sweetness
Cocoa powder (optional)A little, lightly dusted on top

Method

  1. Put the chocolate sauce in a heat-resistant cup of about 300 mL.
  2. Add the freshly pulled espresso and stir well.
  3. Steam the milk into fine foam and pour it over the coffee and chocolate base.
  4. Dust with a little cocoa if you like, and serve right away. Taste for sweetness before deciding whether to adjust the sauce next time.

Pairing note Chocolate sauces vary widely in thickness and sweetness, so 15 g is just a starting point. Choose your sauce first, then fix the amount so your shop can repeat it.

06 / Launching in your store

How to test a bag of beans properly

Compare first, then set the menu.Using the same batch of beans and the same espresso recipe, make a latte, an americano and a mocha, and have colleagues note which they like best, whether the strength is right and whether the finish is pleasant. Once you find the direction, set the name, price and serving standard.

Count the grams and allow for waste.At 18 g of coffee per cup, 500 g makes about 27 full shots in theory, with about 14 g left over; actual yield is lower after grinder retention, dialing in and test shots. If a bag costs P yuan, start with a bean cost per cup of P ÷ 500 × 18, then add waste, milk, sauce and packaging.

Restock in small amounts and log opened bags.Follow the delivered packaging and supplier guidance for storage and best-before; take out only what you need for the day, reseal promptly, and record opening and grind changes. Taste one espresso every morning before service.

NEW ARRIVAL

Your next happy cup starts with this bag

The fun of a new product is turning a possibility into your own everyday recipe. Start with a simple iced latte, or try the more dessert-like dark chocolate mocha, and find the flavor you want to keep on the menu.

Gold Chocolate coffee beans, a 500 g blend, now in stock. Save your favorite cup for the customers who come in every day.

Ask about the product, samples and orderingContact us → Related products · Tea & Coffee IngredientsTake a look →

Product name and size are based on the front of the packaging provided; follow the delivered label and supplier information for full ingredients, origin, roast and storage. The drink recipes are test suggestions, not official brand recipes. Images are AI-generated scenes and drink illustrations, not photos; actual packaging and drinks may differ.

[1] Extraction reference: La Marzocco Home · Basic Espresso Theory (cited only for the general brew ratio and time guidance; it does not verify or endorse this product).

2026.11 · Recipe ideas Milk tea R&D · Meiji whipping cream special

Choosing Meiji whipping cream:
Three drink recipes for milk tea shops

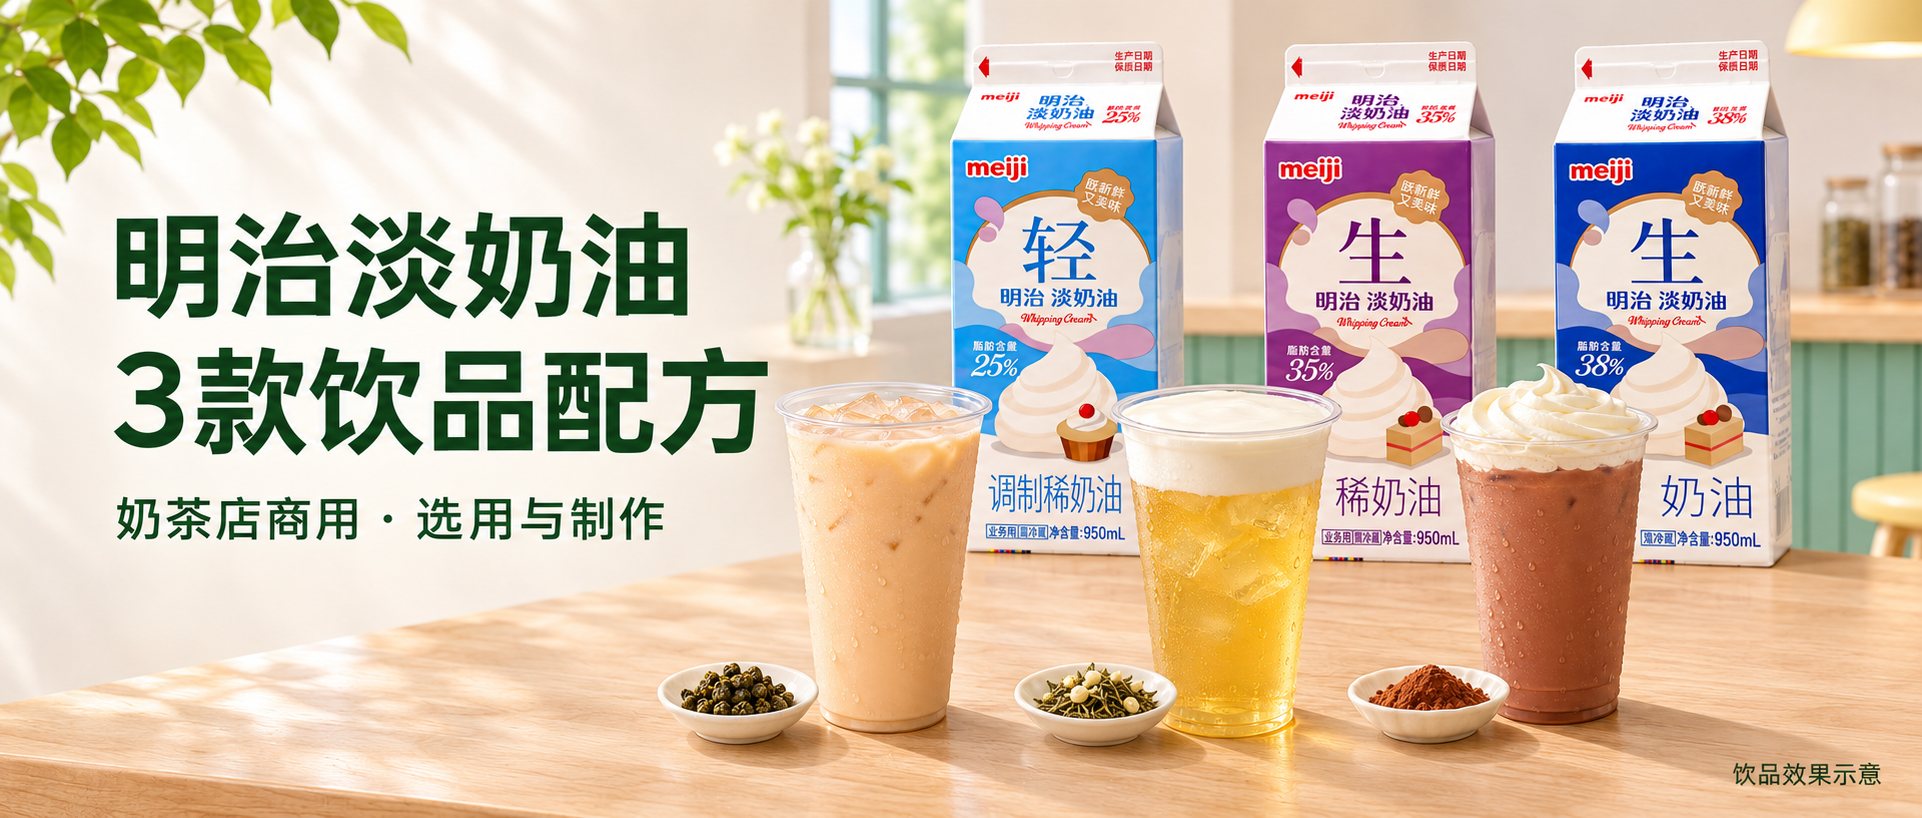
Meiji 25%, 35% and 38% whipping creams with three drinks (AI-generated illustration)
25% · 35% · 38%: choosing and using them | AI-generated scene

The creaminess in a milk tea can melt into the tea or sit on top of the cup. Mixed in, it rounds out the whole drink; on top, customers taste the cream first and the tea after. For a milk tea shop, deciding what texture a drink needs makes it much easier to choose the right cream and set the amount.

Using Meiji's 25%, 35% and 38% whipping creams, we share three applications: mixed into the drink, a pourable cream cap and a piped cream topping. From choosing the cream to building each cup, it's a starting point for testing new drinks step by step.

About these recipes The recipes below are our own test suggestions. They are not official Meiji recipes and have not been verified in a working store. All are designed for a cup of about 500 mL; ice size, cup shape and whipped volume vary, so calibrate fill levels on site. Grams are not the same as millilitres.

01 / Know your ingredients

Three creams: how to put each one to work

Going by the cartons we were given, the 25% cream comes in a light blue carton marked with the character for “light” and is labelled as prepared cream; the 35% purple and 38% dark blue cartons carry the character for “fresh” and are labelled as cream. All three are marked 950 mL.

CreamRole in this articleDrink
25%, light blueNot whipped, mixed straight into the milk teaCreamy Oolong Milk Tea
35%, purpleLightly whipped for a pourable cream capCloud-Top Jasmine Tea
38%, dark blueWhipped to soft, curling peaks for a toppingCream-Topped Cocoa Milk Tea

This table is how we set up this article, not the only way to use each product. If you change the fat content or recipe, recheck taste, whipping and fill levels. “25%” is the fat content stated on the carton and doesn't mean the finished drink can be advertised as low-fat.

Start with the one closest to your current menu: if you already have an oolong base, begin with the mixed-in drink; to add layers, then test the cream cap or topping. Getting one drink right first makes flavor changes easier to judge than adding lots of new ingredients at once.

02 / Mixed into the drink

25%: Creamy Oolong Milk Tea

Here the cream goes straight into the milk tea, so oolong and cream come through in the same sip. No cap is needed, which keeps the drink simple and makes it easy to test the ratio of your tea to dairy first.

IngredientAmount per cup
Cooled oolong tea180g
Whole milk120g
Meiji 25% whipping cream (unwhipped)25g
1:1 syrup15g
Ice120g

Method

  1. Add the cooled oolong tea and syrup to a shaker and stir well.
  2. Add the milk and the unwhipped 25% cream and stir gently. Avoid whisking at high speed for long.
  3. Add ice, shake briefly, and pour everything, ice included, into the serving cup.

Fine-tuning Start by checking whether the tea and cream flavors balance. For a lighter cream taste, try 20 g of cream; for more creaminess, try 30 g. Change one amount at a time, taste, then reset your fill line.

03 / Silky cream cap

35%: Cloud-Top Jasmine Tea

Light jasmine tea below, a smooth cream cap on top. This uses a plain, lightly salted cream recipe so customers taste the cream first and then the tea. There's no cheese in it, so the menu can simply call it a “plain cream cap”.

Make a small batch of cream cap first

200 g Meiji 35% whipping cream, 12 g caster sugar, 0.4 g salt. Use a scale that reads to 0.1 g for the salt.

  1. Take well-chilled cream and pour it into a clean, sanitized, dry whipping bowl. Add the sugar and salt.
  2. Set the bowl over ice water to keep it cold, without letting water into the cream. Mix on low first, then speed up a little; once it thickens, drop to low or check by hand.
  3. Stop when the cream falls from the whisk in a thick ribbon, the trail smooths over quickly, and it still pours easily. Don't aim for piping ridges.
IngredientAmount per cup
Cooled jasmine green tea230g
1:1 syrup15g
Ice150g
Whipped cream cap40g

Method

  1. Mix the cooled tea with the syrup, add ice and shake gently.
  2. Pour the tea and ice into the cup, leaving room for the cream cap and the seal.
  3. Weigh 40 g of whipped cream cap and spoon it gently over the surface with a bar spoon.

Fine-tuning If the cap won't spread, whip the next batch less; if it doesn't cover well, first check that the tea is fully cooled, then check the cap. Try 35 g and 40 g caps to compare thickness and how the tea comes through.

04 / Cream topping

38%: Cream-Topped Cocoa Milk Tea

Cocoa milk tea with a small cream topping suits menus that want a dessert-like drink. The cream brings softness up front, while cocoa and black tea carry the finish. Get the balance right with a simple recipe before deciding whether to add other toppings.

Make a small batch of cream topping first

200 g Meiji 38% whipping cream, 14 g caster sugar. Whip using the same chilling method as above and slow down near the end, until the cream forms soft peaks whose tips curl over and pipes into gentle ridges.

IngredientAmount per cup
Cooled black tea150g
Whole milk90g
Unsweetened cocoa powder8g
Hot drinking water (for the cocoa)25g
1:1 syrup15g
Ice120g
Whipped cream topping35g

Method

  1. Mix the cocoa powder with the hot water a little at a time into a smooth paste. The hot water is already counted in the recipe; don't add more.
  2. Mix in the syrup, cooled black tea and milk. Once the base is cool, combine with ice, pour into the cup and leave room for the topping.
  3. Weigh 35 g of whipped cream and pipe a small topping with a piping bag. Pick a lid that fits the topping height and check before serving that the lid doesn't squash the cream.

Fine-tuning Unsweetened cocoa powder and sweetened cocoa mix can't be swapped one for one. If the cocoa tastes too bitter, adjust the cocoa or the sugar separately; the topping adds sugar too, so judge sweetness by tasting the whole cup.

05 / Serving consistently

Turning a great drink into a repeatable one

Fix the tea base first.Set the brewing ratio, temperature and time according to your tea supplier, and weigh the tea once cooled. All syrup here is sugar and water at 1:1 by weight; if you switch to high-fructose syrup, flavored syrup or other sweetened ingredients, recalibrate the sweetness.

Judge whipping by texture.A pourable cream cap and piped cream need different thickness. Meiji's official whipping basics stress chilling thoroughly, using an ice bath, and judging by how the cream falls from the whisk, slowing down as you get close. We draw on that general approach here; the three drink recipes still need to be tested in your shop.[1]

Store as labelled.All three cartons say to refrigerate at 2–6℃ with a 25-day shelf life, and to use soon after opening. The 25 days do not apply after opening or whipping; record opening and preparation times and follow the actual label and your food safety procedures. The cartons also warn that freezing, warming and over-mixing can affect the cream.

Record weights and costs together.The 40 g cream cap and 35 g topping per cup are the weight after whipping. When costing, record the liquid cream used, the usable whipped yield and the leftover waste, and don't treat the 950 mL carton as 950 g. Add tea, milk, sugar, ice, packaging and actual waste to get the full cost.

Test for how it's actually drunk.Beyond the moment it's served, check taste, melting ice, a sinking cap or a slumping topping at the time people will actually drink it, then decide whether dine-in and delivery can use the same recipe. All three contain dairy; label this clearly and check allergen information for the other ingredients.

Melt cream into oolong milk tea, let a cream cap rest on jasmine tea, and pipe a soft swirl onto cocoa milk tea. Pick the combination that suits your tea base, test it, taste it and record the amounts, then turn it into a drink you can make the same way every day.

Related products · Chilled DairyTake a look →

Note: product names, specifications and storage requirements are based on the carton images provided; follow the label on the delivered product. The recipes are test suggestions, not official brand recipes, and have not been verified in a working store. The cover and drink images are AI-generated illustrations, not photos or recipe test results; actual color, cap thickness and fill lines depend on your own tests.

[1] Whipping basics: Meiji's official food-education guide to whipping cream. That guide is not a recipe written for the three China-market products in this article.

2026.11 · Recipe ideas Milk tea R&D · Cheese cap special

How to use Kiri Cheese Milk Cap:
Three drink recipes for milk tea shops

From whipping the cap to building each cup, bring cheese flavor into your everyday menu.

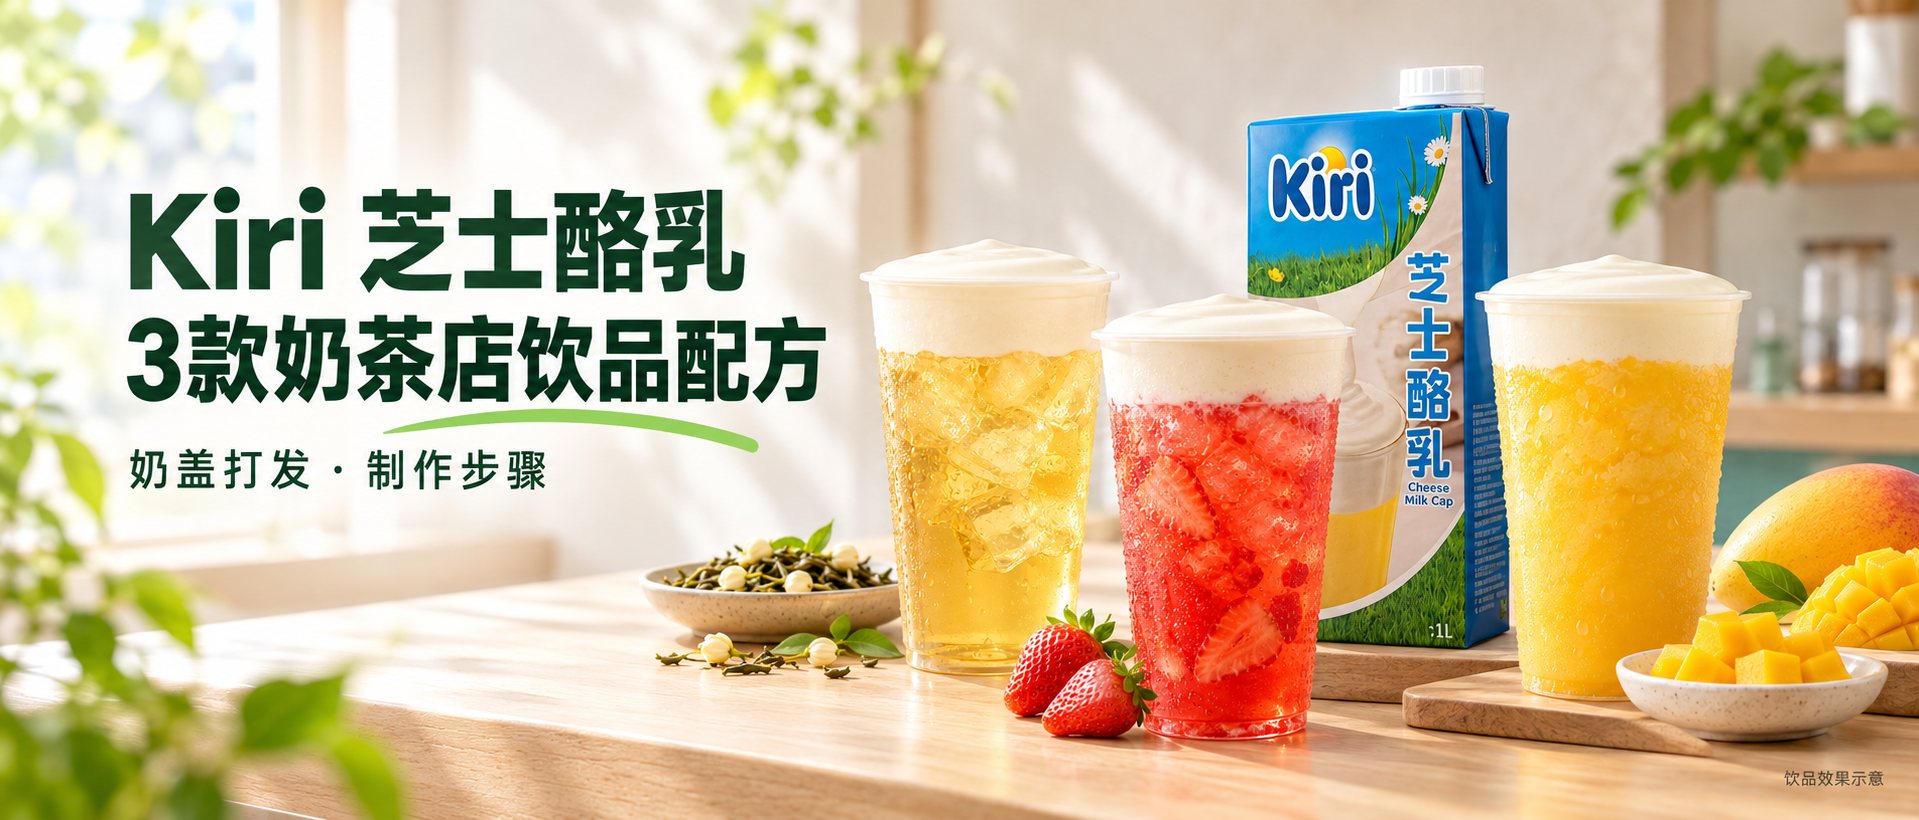
Kiri Cheese Milk Cap with three cheese-cap drinks (AI-generated illustration)
Whipping the cap · Step by step | AI-generated scene

A cheese tea's layers start with the cap. Customers taste the smooth cheesiness first, then the fresh tea or fruit. When the flavors flow into each other well, the drink keeps getting better sip after sip.

For a milk tea shop, a new drink can start from one base cap, paired with plain tea, fruit tea or a smoothie. Using the familiar Kiri Cheese Milk Cap, we've put together three drinks to test in your store, focusing on amounts, order of steps and how to fine-tune.

About these recipes The recipes below are suggested test recipes. They have not been tested in a working store and are not official brand recipes. All use a cup of about 500 mL as the reference; grams are not the same as millilitres, and cup shape, ice and whipped volume vary, so calibrate fill levels on site.

01 / The base ingredient

Get to know this carton

The carton calls the product “cheese milk cap”, classifies it as a milk-containing beverage, lists 1 L net, and describes it as whipping efficiently, with rich cheese flavor and a smooth, fine texture. In drinks, you whip it into a pourable cap and spread it over the surface.

It is handled differently from block cream cheese. For your first tests, check how the liquid whips on its own before deciding whether to season it, and don't reuse a “cream cheese + whipping cream” cap ratio.

02 / The base cap

How thick should the cap be?

Small test batch

200 g of Kiri Cheese Milk Cap, straight from the carton. Don't add sugar, salt, milk or cream at first; if the carton or your supplier gives specific instructions, follow those first.

  1. Pre-chill the ingredient as your supplier recommends, and prepare a clean, sanitized, dry whipping container and tools.
  2. Pour in the cheese milk cap liquid, mix on low first, then whip on medium. Stop to check as you get close rather than going by time alone.
  3. When you lift the whisk, the cap should fall slowly in a ribbon with a smooth surface, and the trail should hold briefly before settling. Use this as your reference for first tests.
  4. Weigh 50 g of whipped cap and spread it over a cup of cold tea. Check coverage, mouthfeel and how it holds over time before settling on the texture for your store.

Serving note The “50 g cap” in all three drinks is the weight after whipping. Whipping changes the volume but doesn't add weight; record the liquid and the whipped yield separately for prep and costing.

Once the base cap is ready, all three drinks below can share it. Brew tea according to your tea supplier's recommendations and cool it; fix your tea-to-water ratio, temperature and time. All syrup here is sugar and water at about 1:1 by weight; recalibrate if you change syrup strength.

03 / Fresh tea

Cheese Jasmine Green Tea

Jasmine tea leads, with the cheese cap in the first sip. A good first test of how the cap pairs with your own tea base: check whether the tea aroma gets buried and whether the finish stays clean.

IngredientPer cup
Cooled jasmine green tea220g
1:1 syrup15g
Ice160g
Whipped cheese cap50g

Method

  1. Add the cooled tea and syrup to a shaker, stir, then add ice and shake gently.
  2. Pour the tea and ice into the serving cup, leaving room for the cap and seal.
  3. Spoon the cap gently down the inside of the cup or over a bar spoon, keeping the surface even.

Fine-tuning Check the tea base's own aroma first, then adjust sweetness. If the tea is weak, fix the brew strength first; if the cap is too dominant, make a second cup with a 40 g cap to compare. Avoid changing several things at once.

04 / Fruit tea

Strawberry Cheese Jasmine Tea

Strawberry meets jasmine tea, with the cheese cap tying them together. A few strawberry pieces in the cup look appetizing and add a bit of fruit to every sip.

IngredientPer cup
Strawberry flesh70g
Cooled jasmine green tea170g
1:1 syrup10g
Ice150g
Whipped cheese cap50g

Method

  1. Put strawberries prepared according to your store's process into a shaker and press lightly to release juice, keeping a few pieces.
  2. Add the cooled tea and syrup and stir, then add ice and shake gently.
  3. Pour everything, fruit included, into the serving cup and finish by gently spreading the cheese cap on top.

Fine-tuning Taste the strawberries for sweetness and acidity before setting the sugar. If you switch to sweetened strawberry jam or purée, recalibrate the recipe; don't swap it one for one for fresh fruit and keep the same sugar. Add the cap last and never blend it at high speed with the fruit tea.

05 / Creamy fruit

Mango Cheese Smoothie

For a more dessert-like drink, try mango with cheese. Blend fresh mango, milk and ice into a fine smoothie and top with the cap: smooth first, then full fruit flavor.

IngredientPer cup
Mango flesh130g
Whole milk100g
1:1 syrup10g
Ice150g
Whipped cheese cap50g

Method

  1. Add the mango, milk, syrup and ice to a commercial blender that can crush ice.
  2. Blend according to the equipment instructions until there are no large ice chunks and the texture is fine and pours easily.
  3. Pour into the serving cup, leave room for the cap, and top with the whipped cheese cap.

Fine-tuning Mango ripeness affects sweetness, water content and fiber. Fix the mango and milk amounts first, then adjust ice in 10–20 g steps, rechecking the fill level each time. Make smoothies to order and check melting and separation for delivery.

06 / In your store

Turning recipes into repeatable drinks

Fix the weights, then the fill lines.Make one cup of each recipe first, weighing every ingredient on a scale. Mark the base line and cap line for your own cups, leaving room for the seal or lid. If your cup is larger, don't top it up with water without tasting first.

Change one thing at a time.Record tea strength, syrup, cap weight and tasting notes, and compare taste right after serving with taste at the expected drinking time. Once finalized, write it up as a store recipe card that fixes the ingredients, order and weights.

Cost by actual use.Ingredient cost per cup = the actual amount of each ingredient × its unit cost, plus packaging and waste. For the cap, record the liquid used, the usable whipped yield and the amount per cup; don't estimate cups as “1 L ÷ 50 g”.

Prep to match sales.Make caps in batches as needed and record preparation and opening times. Follow the actual label and your store's food safety procedures for storage, refrigeration and use after opening, rather than a blanket time limit that hasn't been verified. The product contains dairy; make this clear on the menu and to customers, and check allergen information for the other ingredients.

Start with a fresh Cheese Jasmine Green Tea, then branch out to the strawberry fruit tea and mango smoothie. Get the balance of tea, fruit and cap right so each drink has its own character, then turn that into something your store can make the same way every day.

Related products · Chilled DairyTake a look →

The recipes are R&D test suggestions, not official brand recipes, and have not been verified in service. The cover and drink images are AI-generated illustrations, not photos or recipe test results; actual color, cap thickness and fill height depend on your own tests.

Application reference: Yinpinbao (beverage trade media), “Review: a new kind of cheese brings fresh ideas for autumn and winter drinks” (used only as a reference for whipping this product; the recipes and guidance here are our own and do not cite its test figures).

2026.11 · Company news CYUTEA · Company news

Across platforms, together for Double 11

CYUTEA's 2026 online event is on now

CYUTEA 2026 Double 11 multi-platform campaign (AI-generated brand campaign illustration)
2026 Double 11 · Across platforms · Taking part | AI-generated brand campaign illustration

The annual Double 11 (11.11) online shopping event is under way. CYUTEA is taking part this year through our own WeChat mini program and our stores on Taobao, JD.com, Douyin Mall, Xiaohongshu, WeChat Shop and Pinduoduo.

From everyday shopping to stocking a store, we want more online channels to make it easier to learn about products, check events and ask questions, on the platform you already know.

01 / Across platforms

Follow us on the platforms you already use

This Double 11, several CYUTEA online channels are taking part. If you usually shop in WeChat, follow our own mini program and WeChat Shop; if you use Taobao, JD.com, Douyin Mall, Xiaohongshu or Pinduoduo, visit our store there to see event products and details.

  • WeChat mini program (our own)
  • Taobao
  • JD.com
  • Douyin Mall
  • Xiaohongshu
  • WeChat Shop
  • Pinduoduo

Each platform runs its own schedule and rules. As you browse, check the event page of the store on the platform you use for product specs, available discounts and order requirements, then choose what works for you.

02 / Shopping ideas

From an everyday cup to café service

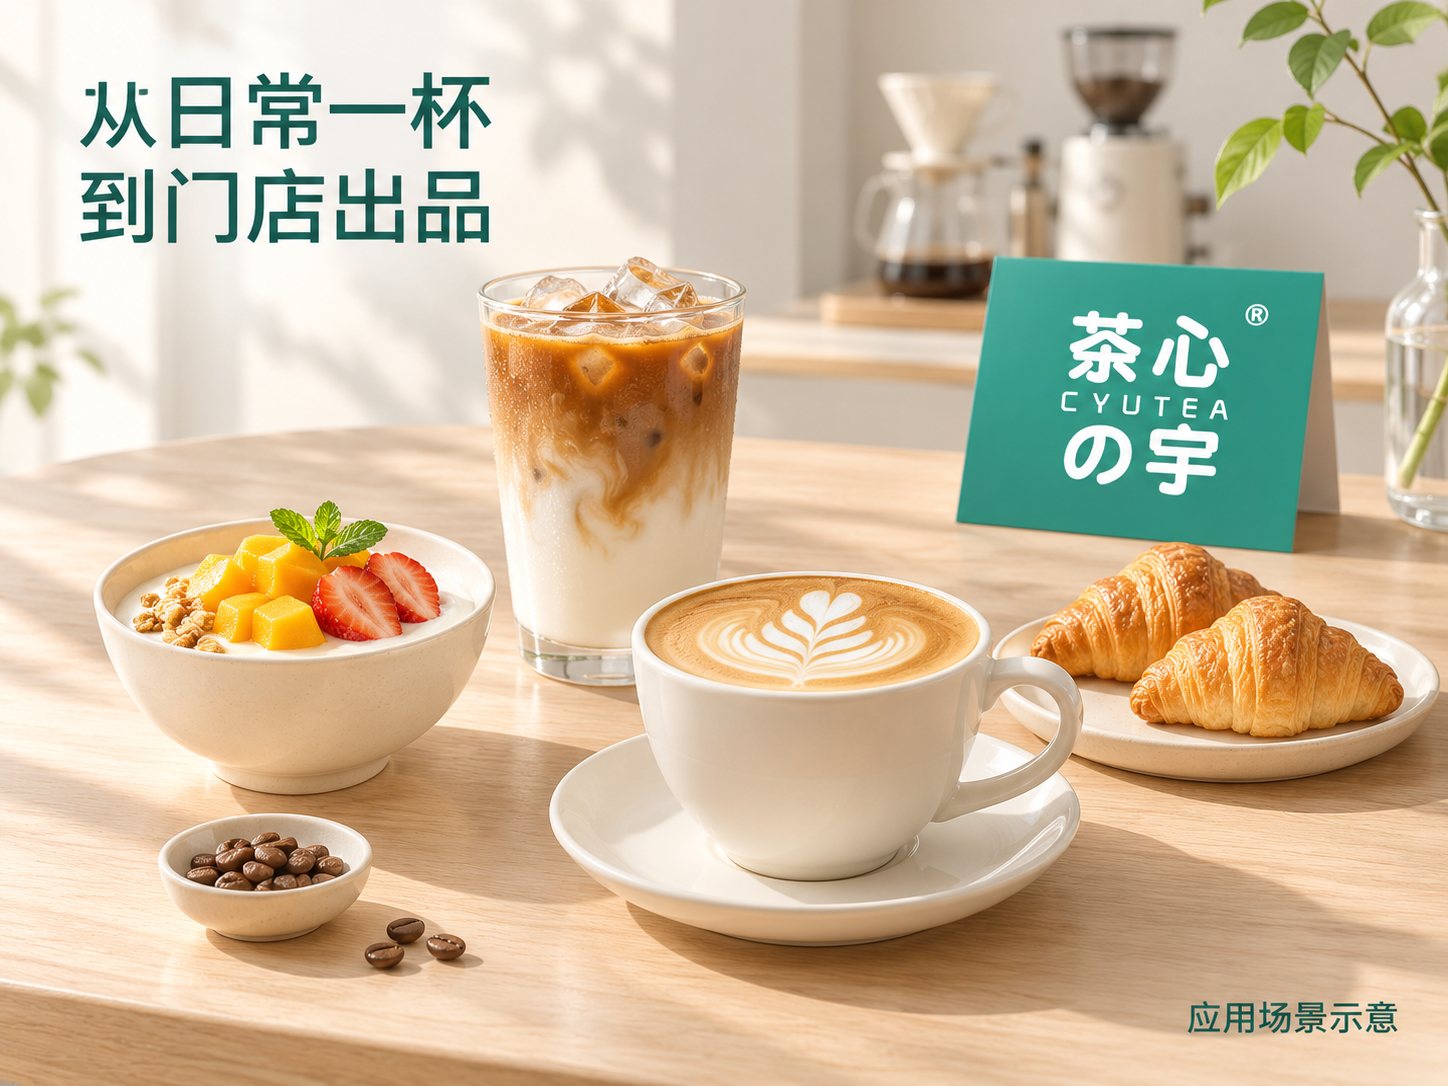
Yogurt bowl, iced latte, hot latte and croissants on a wooden table (AI-generated scene)
From an everyday cup to café service | AI-generated scene

For households, Double 11 is a good time to sort out your shopping list. What to drink at breakfast, what coffee to make in the afternoon, any baking plans for the weekend: start from what you actually need.

For coffee shops, milk tea shops and restaurants, the event is also a chance to plan ingredients around daily use and new menu items: which staples to restock, what to try first, and how much to buy for your service plan.

For dairy and other products with storage requirements, check the size, shelf life, storage conditions and delivery arrangements, and buy amounts that fit how fast you use them and how much storage you have.

03 / Shopping service

Focused on the event, and on every purchase

Being on more platforms means more chances to meet customers. What also matters to us is whether product information is clear, whether questions get answered, and whether customers understand how orders and after-sales are handled.

During the event, we'll keep communication clear on product information, shopping questions and order service. For specific products, uses, delivery areas or order progress, please contact the customer service of the store you ordered from so we can help with your actual order.

04 / Shopping guide

Before you order, check these first

  1. Confirm the store and products. Confirm the store, product name, size and quantity, and choose what suits you.
  2. Check the current rules. Event timing, participating products, coupon thresholds and stacking rules are as stated on each platform and store page.
  3. Check delivery details. Check your address, delivery area, shipping fees and estimated dispatch; for special delivery needs, contact the store's customer service first.
  4. Watch for page updates. Stock and event details may change, so check the page again before ordering.
2026 · Double 11

Thank you for following us; we look forward to meeting you

Thank you for your continued interest and support. Whether you've shopped with us for a while or are discovering us for the first time, you're welcome to visit CYUTEA's online stores this Double 11.

Our own WeChat mini program, Taobao, JD.com, Douyin Mall, Xiaohongshu, WeChat Shop, Pinduoduo and more: the event is on now.

Follow our stores on each platform to see current offers. We hope every purchase makes your daily life or your store a little easier.

CYUTEAMeeting you on every platform · Serving every purchase with care

Where to find us · E-commerce & RetailTake a look →

Each channel runs its event independently. Timing, participating products, prices, discount rules, stock and delivery are as shown live on each platform and store page.

The campaign cover and scene in this article are AI-generated illustrations and do not show actual gifts, product bundles, platform interfaces or company premises.

Be the first to see new products

Search “茶心宇CYUTEA” on Xiaohongshu, Douyin, WeChat Channels, WeChat Official Accounts and Bilibili to follow us.

Follow on WeChat →